Why Ear Climbers Tip Down (And how to keep ear climbers upright)
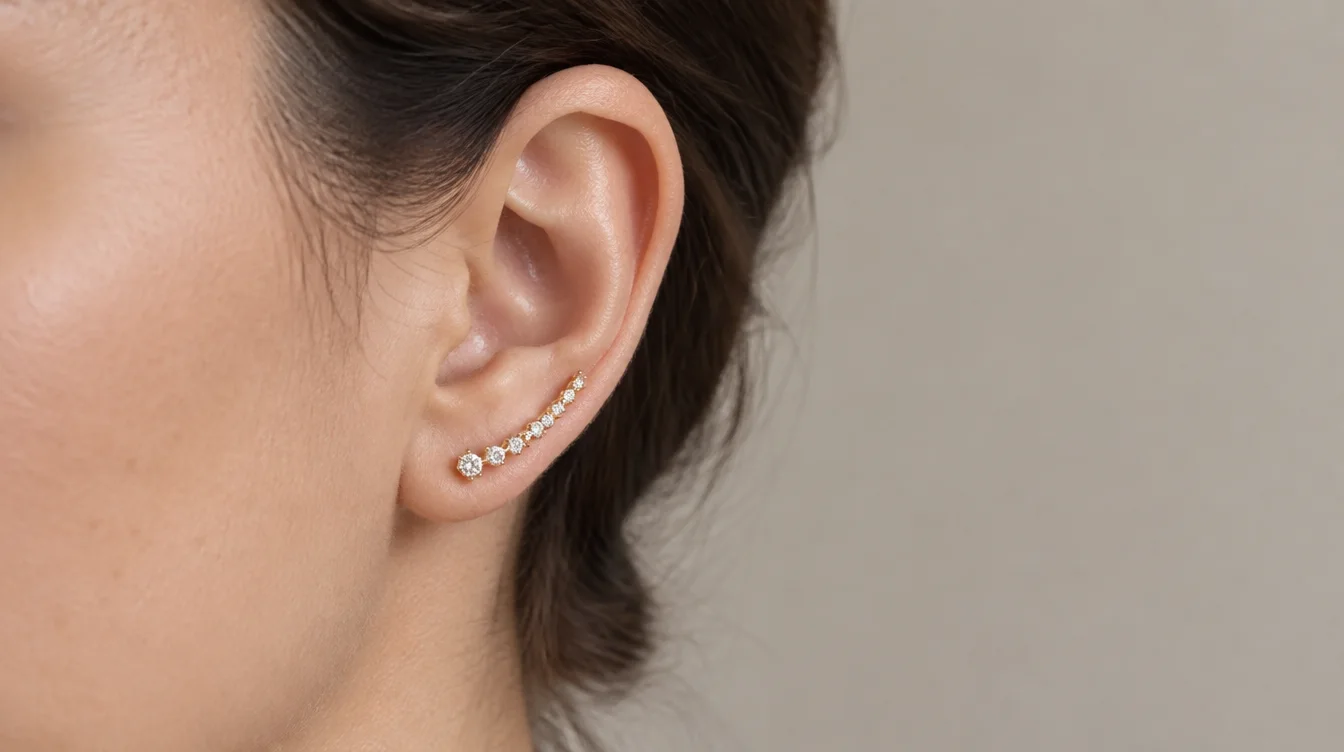
If you are wondering how to keep ear climbers upright, start with their direction, then check the post position and backing fit. A pierced climber should follow your ear with light, comfortable contact. If it keeps turning after those checks, its curve may not suit your ear, and bending it yourself could damage the piece.
Check the direction before you tighten anything
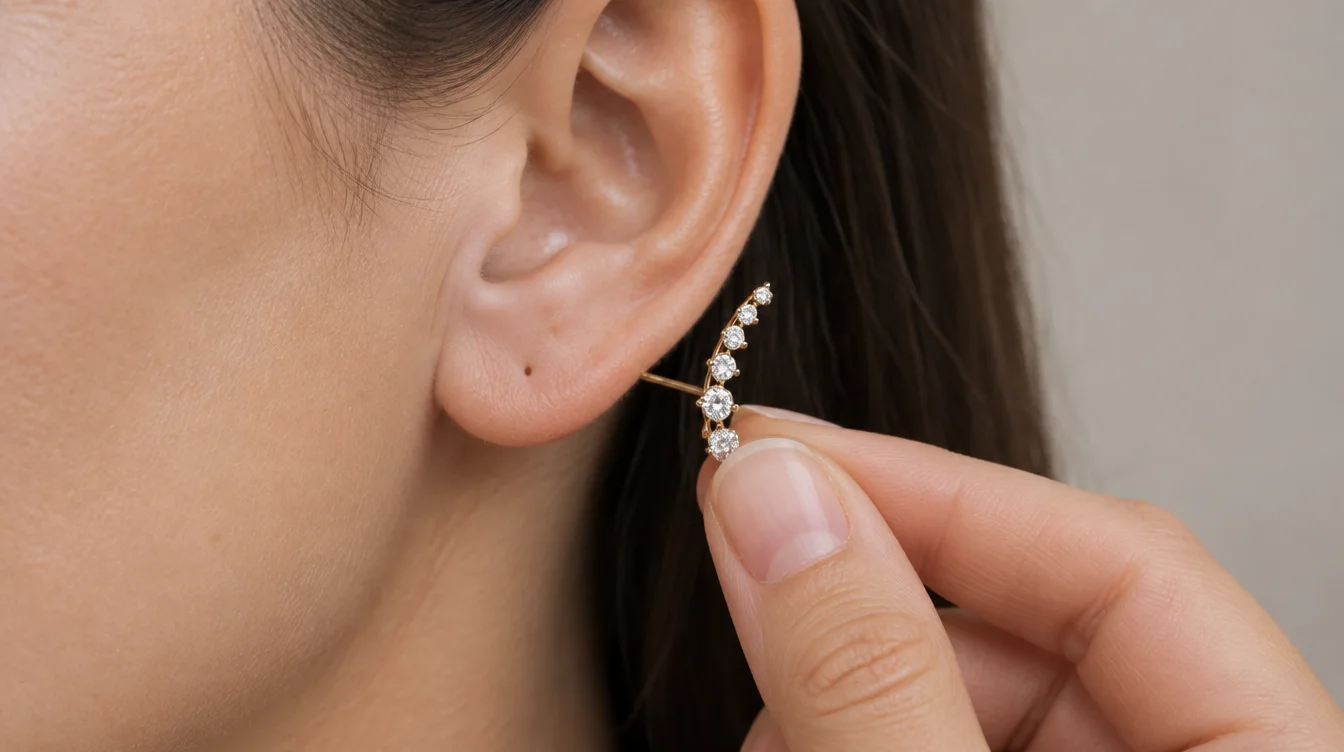
A climber placed on the wrong ear may point upward in your hand but turn downward once worn. Hold each earring beside your ear before inserting it. The design should rise from the piercing along the outer line of your lobe, not cross toward your face or jut away from your ear.
Does it look wrong in the mirror? Swap sides before changing the back. Many directional pairs are made as mirror images, though some designs are reversible. Check the maker’s description if you cannot tell which is which. The useful test is where the design travels from your piercing, not whether the earrings look alike on a tray. This guide to climber orientation and fit explains why direction and fastening position both matter.
When shoppers ask about ear climbers left or right, they often mean the decorative curve. Look at the support behind the ear too. A mirrored front will not sit well if its rear support lands on an awkward part of your lobe. Once the direction is right, placement becomes much easier to judge.
How to keep ear climbers upright starts at the piercing
The piercing is the anchor, so insert the post fully before rotating the design upward. With a straight post, guide it through the healed hole as you would a stud. Then turn the front until it rests along your lobe and attach the back. With a curved wire or hook, follow the maker’s insertion method instead of treating it like a straight stud.
Look at the front in a mirror. The lowest part of the design should sit near the piercing, while the rest follows the ear without pulling the hole sideways. A small gap near the upper tip may be normal. A tip that floats far from your ear can catch on hair and give the climber room to rotate.
Do not force a post through a tender or unhealed piercing. If the angle feels wrong, take the earring out and start again rather than pushing harder. Placement should feel easy. If a well placed climber still drops, the next place to look is behind your ear.
Match the backing to the climber, not just the post
The right backing holds a pierced climber steady without squeezing your lobe. For a straight post with a friction back, push the back on until the front rests close to your ear. Leave enough room that the lobe is not compressed. A back that slides freely may let the long front turn, even when the earring cannot fall out.
How do ear climbers stay in place?
Most pierced ear climbers stay in place through the post and backing, a shaped rear wire, or both. The front follows the lobe while the fastening limits movement at the piercing. Descriptions of common climber fastenings show why one adjustment will not work for every design.
If your pair has a long rear wire, check where it rests before squeezing anything. It should touch the back of your lobe lightly, not dig into the skin. A straight post needs a back that fits its thickness and stays put. Ear climber earring backs cannot fix a rear wire with the wrong shape.
Try a clean, compatible replacement back if the original feels loose. A larger support back may help some straight post designs, but it cannot correct a front that is too long or curved the wrong way. For a closer look at loose fastenings, see this earring backing security guide. With the fastening set, test the earring during normal movement.
Use a short movement check to find the cause
A movement check shows whether the climber slips because of placement, backing fit, or its shape. Put it on, look straight ahead, and note where the tip rests. Turn your head both ways, smile, and tuck your hair behind your ear. Check the tip again. Avoid tugging at the earring to prove it is secure.
Read the pattern, not just the final position
If the entire earring turns at the hole, revisit the back and post fit first. If the lower end stays put but the upper tip lifts away, the curve may not follow your lobe. When the front tilts forward as well as down, check whether its length and weight pull it beyond the support of your piercing.
Here is a useful comparison: wear the pair for a few quiet minutes with the backs set the same way. If one side slips and the other does not, swap the earrings only if the design is reversible. If they are directional, compare how each one touches its own ear instead. Ears need not have identical curves, so a matched pair can fit differently.
So how do ear climbers stay in place during an ordinary day? They need a firm anchor and a curve that rests comfortably. If either fails the movement check, more tightening is unlikely to help. Next, consider what you can safely adjust.
Adjust only what the design allows
How to adjust ear climber earrings depends on their construction. Some simple wire designs are meant to be eased closer to the lobe by hand. A rigid post, stone setting, soldered joint, or plated decorative section may not tolerate bending. Read the maker’s care advice before changing its shape.
If adjustment is allowed, remove the earring first. Make a tiny change to the rear support, then try it on again. The aim is gentle contact, never a clamp. Stop if you feel pressure, see a mark that lasts after removal, or need force to put it on. Repeated bending can weaken a wire, especially at a joint.
A loose friction back calls for a different fix than a poorly shaped wire. Replace a compatible back rather than bending the post to make it grip. If the post is bent, cracked, or visibly worn, ask a jeweler to inspect it. This post repair guide covers why damaged posts deserve attention rather than another home adjustment.
Knowing how to adjust ear climber earrings also means knowing when fit is the issue. If the front rises past the usable area of your lobe, pressure behind the ear cannot make it shorter. A shorter style or a different curve may feel better. These common questions can help you decide.
Frequently asked questions
Why does my ear climber rotate down even with a tight back?
A tight back can hold the post while the front still turns. Check the climber’s direction, where its upper tip touches your ear, and whether the post sits at an angle. If tightening causes pain, stop and reassess the fit.
Can I wear either climber on either ear?
Some climbers are reversible, but directional pairs are made for specific sides. To choose ear climbers left or right, trace the path from the piercing to the upper tip. If swapping sides makes the design point outward or downward, keep each piece on its intended ear.
What if my ear climber earring backs keep slipping?
Try a clean replacement back made for the post style and thickness. Do not force a back that grips too tightly. If several compatible backs slide, have a jeweler check the post for wear.
Does a climber need to touch my ear all the way up?
No. It needs enough contact and support to stay comfortably aligned, not pressure along every part of the design. A small gap is less concerning than a tip that catches on hair or shifts when you turn your head.
The test is simple: does the climber stay aligned without hurting? If not, stop adjusting and look at the fit.
Keep the pair that fits your ear
A tighter squeeze is not the answer to how to keep ear climbers upright. Start with the correct side and placement. Use a back that holds without pinching, then check what moves. If the curve still fights your ear, ask a jeweler to assess it or try a shape that follows your lobe. A climber should stay up because it fits, not because you keep fixing it.