Is a Bulky Preview Fooling Your custom ring CAD approval checklist?
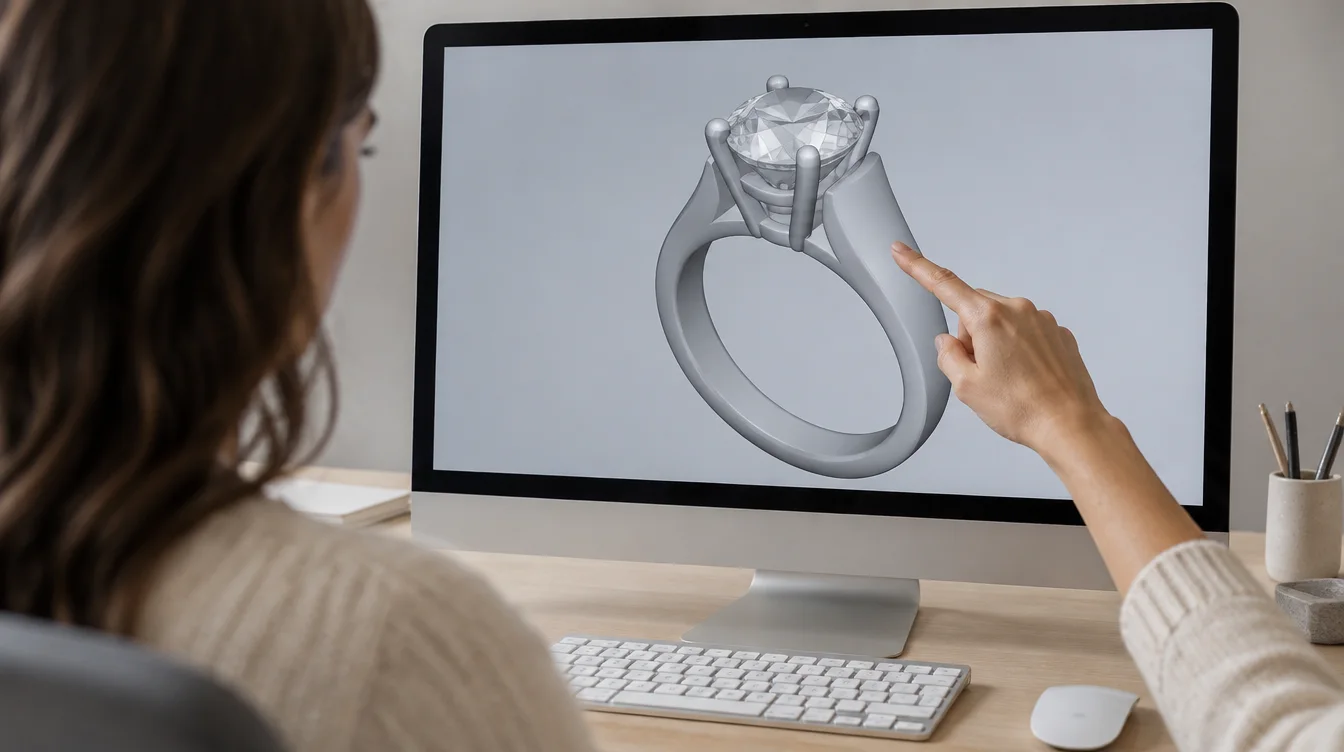
A bulky ring CAD may show a real design problem, an enlarged screen view, or metal that will change during setting and finishing. Use this custom ring CAD approval checklist to check the planned finished measurements before you approve the design. If the jeweler cannot explain what will change, ask for a clearer drawing or a revision rather than guessing from the render.
Why does your ring look so bulky on screen?
A close CAD view makes small parts look large. It cannot tell you whether the finished ring will look slim. CAD shows the planned shape. A render adds light, color, and a camera angle. Neither gives you a reliable sense of size on its own. Polish, stone seating, and workmanship must be checked on the physical ring, as this CAD review guide explains.
Start by checking how the ring is shown. A close view can make a narrow shank fill your screen. A view from above may hide a tall basket. A low camera angle can make prongs seem to spread across the stone. Rendered shine may also draw your eye to every metal edge. None of those effects tells you the final size in millimeters.
Ask for a straight top view and a true side view at a stated scale. Then ask to see the ring beside a finger or a plain band, with the scale noted. A hand image can help you judge the overall look, but it should not replace measurements. If possible, compare two design options at the same zoom and angle. Otherwise, the larger image may look like the larger ring even when its dimensions are smaller.
Here is the first rule for how to review ring CAD: name the part that bothers you. Is the shank broad, the basket tall, or the metal around the stone heavy? “It looks bulky” is a fair reaction, but a named concern gives the jeweler something to measure. Once you have located that concern, you can check whether the drawing or the design caused it.
What measurements belong on a custom ring CAD approval checklist?
A useful custom ring CAD approval checklist records finished sizes at named points. A promise that the ring will look delicate is not enough. Ask for measurements in millimeters on the latest revision. Check shank width and thickness, shoulder width, total ring height, and visible metal around the center stone.
Separate band width from band thickness
Width is what you see across the shank when looking down at your hand. Thickness is the distance from the inside of the ring to its outer surface. A band can be narrow from above yet feel deep between the fingers. It can also be broad but fairly low against the hand. That is why engagement ring band width and thickness need separate answers.
Ask where each figure was taken. The shank base may not match the shoulders near the center stone. A tapered band changes width along its length. A comfort shaped interior changes how its cross section feels. Request planned measurements after finishing and a marked view of each point. Without those labels, two people can quote different widths for the same ring. Both could be correct.
Use a same scale comparison
Suppose one proposed shank is 2.0 mm wide at its base. Another is 2.4 mm wide at the same point. The second is 0.4 mm wider, or 20 percent wider by this simple calculation. That does not mean it will look 20 percent bulkier. Shoulder shape, stone size, and finish also affect what you see. Still, the figures give you a clear difference to discuss at the same viewing scale.
Ask what each number describes
A measurement may describe the CAD model, the intended cast piece, or the finished ring. Those are not the same. Ask the jeweler to mark the stage for each figure. Ask which figures are targets rather than guaranteed results. For engagement ring band width and thickness, get the intended finished sizes at the base and shoulders. Have any allowed variation stated in writing.
Numbers settle the band question. The next check is whether the head of the ring adds more height than you want to wear.
Is the setting actually too high?
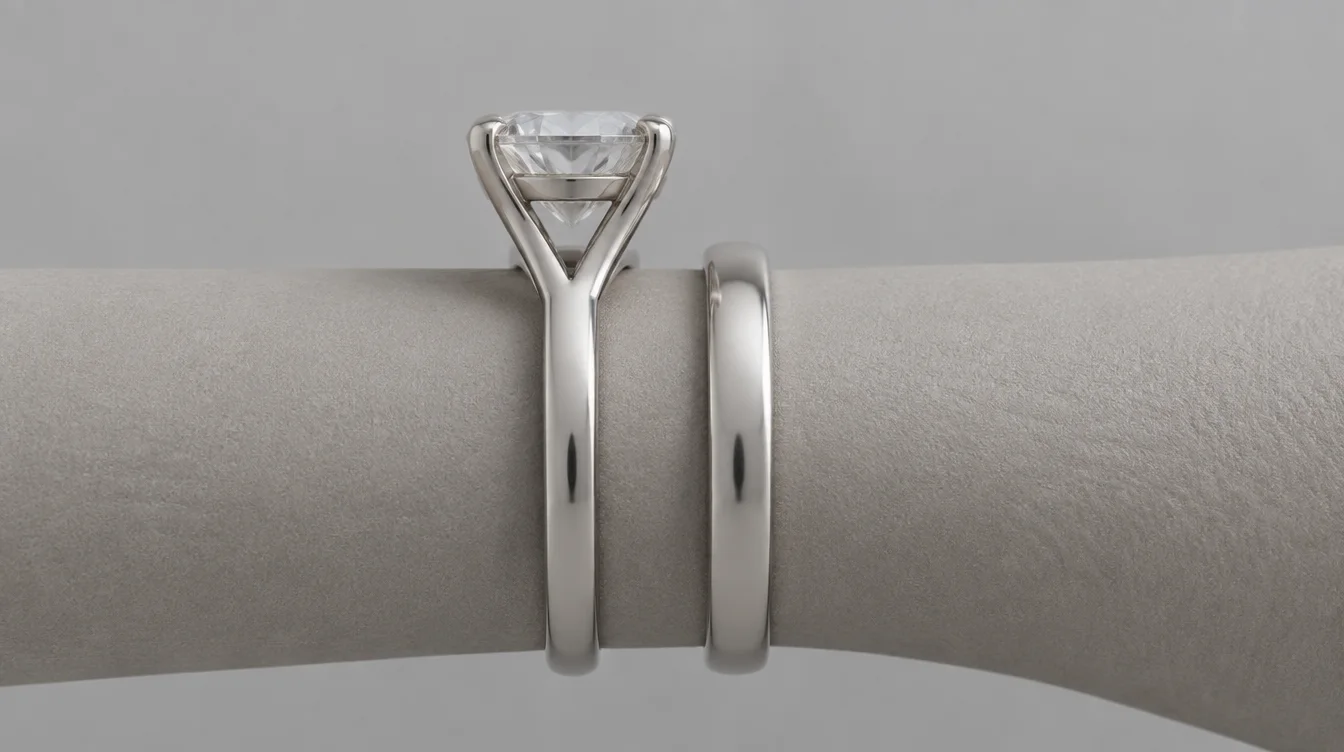
Engagement ring setting height is too high for your needs when the measured profile conflicts with how you plan to wear the ring, not merely because the side render looks tall. Ask for a true side view with the ring positioned as it would sit on a finger. Have the jeweler identify the highest point and the point from which height is measured.
People often mean different things by “low.” One person means that the stone sits close to the shank. Another means that the top of the stone sits close to the finger. Those are related but distinct. A deep stone may need room below its girdle, while the gallery, bridge, and basket shape also affect the profile. Ask what part of the proposed height is needed for the selected stone and what part is a design choice.
Think about your normal day. A tall ring may bother you if you wear fitted gloves, handle fabric, or want it out of the way. It may still look elegant. If you plan to wear a straight wedding band, ask to see both rings together from the side. Lowering the setting may reduce clearance for that band. Keeping the height may call for a different band shape. Neither choice is always wrong. Review the pairing before you commit.
The custom ring approval discussion from Orleone makes a useful point: face up scale and side profile answer different questions. A ring can look slim from above yet sit higher than expected. Record the planned engagement ring setting height. Check it with the band you will actually wear, not an imagined future match.
If the height works but the top still looks heavy, look closely at the prongs and other metal around the stone.
Will thick CAD prongs look the same on the finished ring?
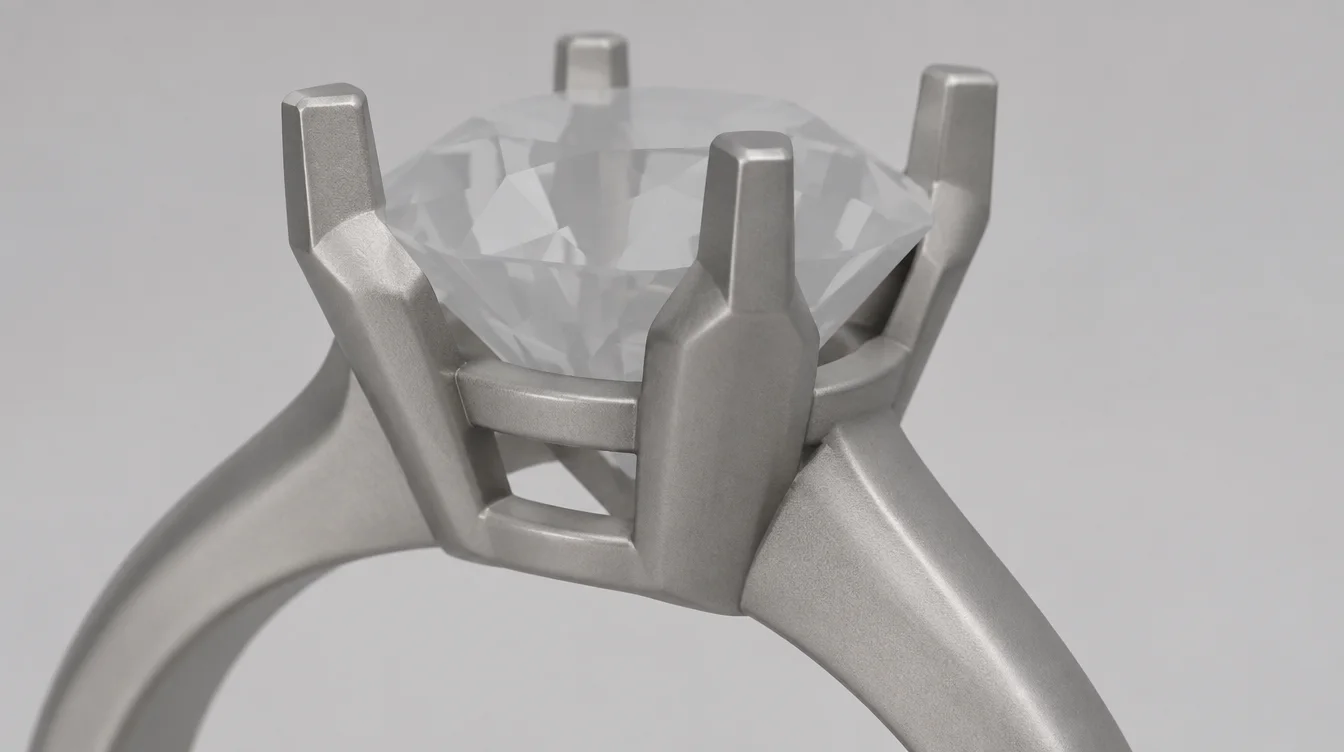
CAD prongs may include extra metal for setting and finishing. Do not assume every heavy prong will become fine. The jeweler needs enough material to make and finish the planned setting. What remains depends on the construction, stone, prong style, and bench work. A render cannot prove a finished prong’s shape or contact with the stone.
If you are worried about engagement ring prongs too thick for the stone, ask two questions. What prong shape will remain after the stone is set? Which dimensions in the CAD are intended to change? Request a close view that labels the prong bases and intended tips. A broad base and a neat tip can have a different look from a prong that stays broad across the stone.
Do not ask for the thinnest possible prongs. They hold and protect the stone. A pointed corner, for example, may need different protection from a rounded edge. Ask how the proposed prongs suit your actual stone. Also ask where the jeweler can refine metal without weakening the planned setting. SightlyCarat’s CAD review also cautions buyers to separate visible render geometry from the finished work that must be checked later.
Finishing can soften edges and make a prong look less heavy. Still, do not approve a shape you dislike because someone says it will “polish away.” Ask to see the planned finished look in a similar photo, sketch, or revised render. If that look needs a noticeable amount of metal removed, ask the jeweler whether it still suits the setting plan.
For a custom ring CAD approval checklist, “the prongs are temporary” is not enough. Ask what will change, what will stay, and how the finished prongs will hold the stone. Then consider which parts of the preview you can fairly compare with the final ring.
How should you compare ring CAD vs finished ring?
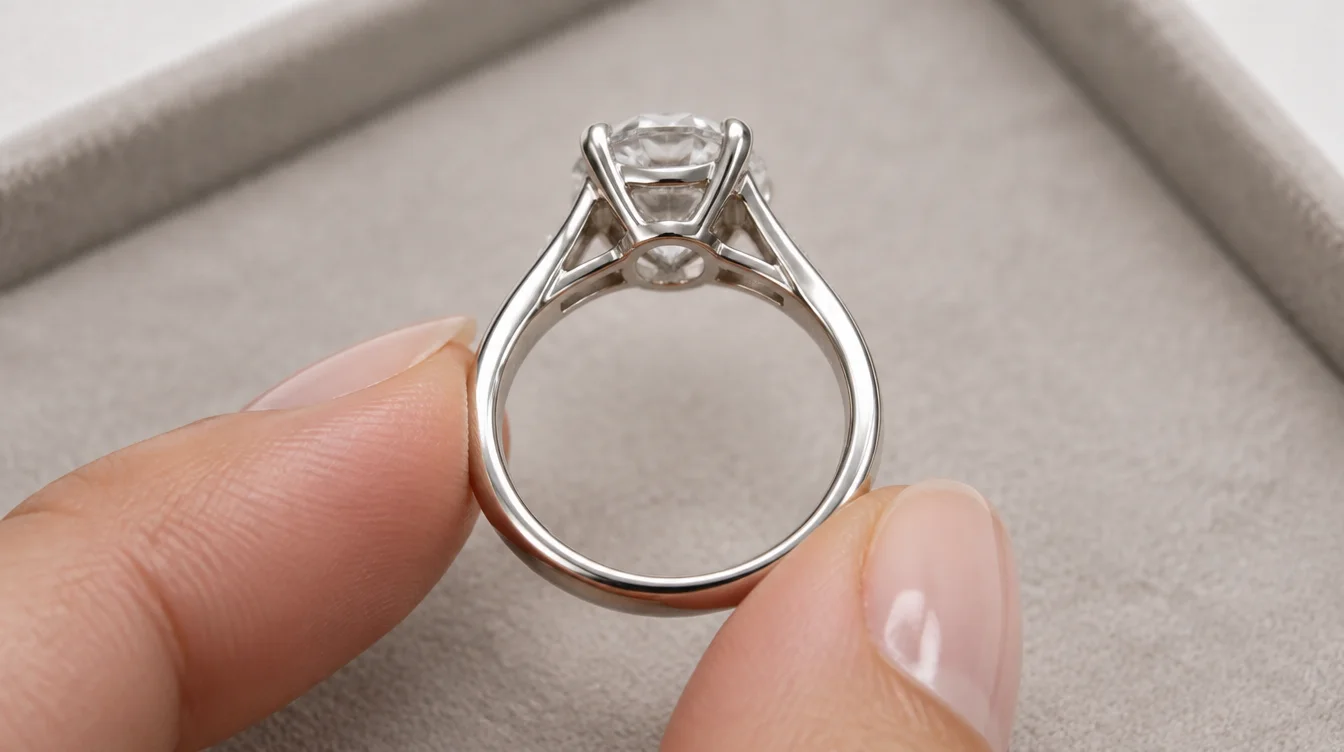
A ring CAD vs finished ring comparison is clearer when you separate shape from finish. CAD can show the planned outline, sizes, and part placement. The finished ring has real metal surfaces, a seated stone, polished edges, and the maker’s work. Treat a render as a design record, not a photo of the future ring.
Compare like with like. Use a straight top view to judge the face up outline. Use a true side view to judge height and gallery shape. Turn to an underside view for the bridge and openings. Then check a view from the end of the finger for shoulder and basket proportions. The dimensioned view advice in SightlyCarat’s guide supports asking for named measurement points instead of approving words such as “delicate” without figures.
Photos of completed rings from the same maker can answer a narrow question. How does that maker finish similar prongs, edges, and surfaces? The photos cannot promise that your ring will look identical. Check for the same setting style, metal, and stone shape. A close photo of a tiny solitaire is a poor match for a larger ring with a different head.
Watch for claims about finish, too. A glossy render may make each edge look hard and bright. A brushed finish may reduce glare, but it will not change the agreed shank width. Softening an edge can make the ring look and feel less sharp. It will not fix a basket that is too tall. Ask which concerns finishing can address and which need a CAD revision.
When reviewing ring CAD vs finished ring, keep a written record beside the images. Note the revision, ring size, metal, stone dimensions, finished measurement targets, and finish. If a photo shows the expected look, name the feature it shows. A reassuring photo should not replace your ring’s specifications.
If pictures and measurements still leave you unsure about bulk on the hand, a physical model may answer the remaining question.
Should you request a wax or resin model before approval?
Ask about a wax or resin model if your main doubt is the ring’s overall scale or profile. It can show how much space the design takes up. It cannot show the finished metal ring’s exact weight, polish, stone setting, or wearing comfort. Driona’s comparison of approval evidence draws that boundary between a model and a finished piece.
Ask what the model represents before relying on it. Was it made from the latest CAD revision? Does it show space for the center stone, the prongs, and the intended wedding band? Will you see it at full size? If a part is missing or enlarged for handling, the jeweler should say so. A sample is only as useful as the design it represents.
A model can help when the drawings seem fine but the whole ring still feels too large. Seeing the shank and head together may show why. Perhaps the shoulders widen too soon. Perhaps the basket sits higher above the finger than the side image suggested. Ask the jeweler to test those specific changes in the next revision.
A model has limits. It may add cost and time, depending on the jeweler’s quote and process. Unpolished resin may also look dull or rough. Do not reject the design for that surface alone. Judge its scale and shape. For a tiny prong tip, a marked close view and a similar finished example may tell you more.
Use the physical sample to settle only what it can show. Then make a clear decision about the CAD revision and its written specifications.
When should you request a revision instead of an explanation?
Request a revision if a measured feature differs from what you want. Ask for an explanation if scale, camera angle, or planned finishing may be the cause. This keeps one concern from becoming many unrelated edits. It also stops you from approving an unwanted size based on reassurance alone.
Say the ring looks wide at the shoulders. First, ask for the shoulder width and a top view at scale. If the figure matches your agreed design and you like a physical sample, the render likely caused your doubt. If the shoulders measure wider than you want, request a narrower option. Compare it with the current version at the same scale and angle. Ask whether the change affects the setting or wear.
Use the same method for height. The camera angle may make a basket look taller than its agreed side measurement. If so, you may only need a clearer view. If the specified height bothers you, ask for a lower design. Have the jeweler show any effect on stone clearance and wedding band fit. “Make it less bulky” is too open to interpretation.
Concerned about engagement ring prongs too thick after finishing? Ask for the intended tip and base shapes in writing. A close finished example with a matching stone and setting may answer your concern. If the planned tips are still too broad for your taste, ask for a revised prong proposal. Do not count on hand finishing to change a shape you have approved.
A practical custom ring CAD approval checklist has three outcomes. Approve the named revision, request a specific revision, or pause for missing evidence. Before approval, check your jeweler’s terms. Changes made later may affect price or timing. This jeweler’s CAD approval discussion describes why resolving measurements and revisions before production matters more than judging a single attractive render.
The final questions below help you make that decision without reopening the whole design.
Questions buyers ask before approving a bulky ring CAD
Approve a bulky looking CAD only when you know its planned finished sizes. You also need to know what may change during making. These answers address doubts that may remain after you check the views and measurements.
How do I know whether the CAD is shown at actual size?
Ask for a view with a stated scale or a dimensioned drawing. Screen size cannot tell you the ring’s size because zoom settings vary. For how to review ring CAD on your own hand, pair the measurements with a full size model when the jeweler offers one.
Why do the prongs look thicker in CAD?
The CAD may show metal that the jeweler plans to shape while setting and finishing the stone. Ask which parts will change and what the finished tips should look like. If the answer is only “they will look fine,” request a marked view or a relevant finished example.
Can polishing fix a band that looks too wide?
Polishing can affect an edge and surface finish, but it is not a substitute for agreeing on the finished band width. Ask for the target width at the base and shoulders after finishing. If either target is too wide for you, request a design revision before approval.
Does a wax or resin model prove the ring will feel comfortable?
No. A model can help you judge scale and profile, but its material and finish differ from the finished ring. Use it to test your reaction to the shape, then discuss fit and construction with the jeweler.
With those answers settled, you can approve the design for what it is meant to become, not for what an enlarged image seems to show.
Approve the measurements, not a reassuring promise
A bulky CAD preview calls for questions, not an automatic rejection. Check the scale first. Then confirm the finished band measurements, setting height, prong plan, and finishing changes on the exact revision. If a detail still looks wrong, ask for a targeted revision.
Before you say yes, send the jeweler a short note. Name the revision and the measurements you expect. Ask what the render shows, what will change at the bench, and what can only be checked on the finished ring. You should know what you have approved, not merely feel relieved that the CAD review is over.